Monday, August 17, 2015

Things of Beauty and Utility 4 - Railway Track Chest

Old Tuck Chest recovered in Railway Tracks Fabric
A mess of railway track pieces


I continue to do battle with Estelle's endless pile of toys - and this week, I declared war on the railway track pieces which were just shoved into the box they came in! 


tuck chest destined for skip
Old tuck chest destined for skip


I decided to recover an old tuck chest which had been destined for the skip using my new railway track design fabric.  I thought the silver edging would be a great contrast for my railway track design and would fit in with the theme perfectly.


Stiffen fabric and cut
  I measured out each section of the chest and cut a piece of my fabric slightly bigger than that section.  I reinforced each section with iron on fabric stiffener.  When I cut the panels, I made sure the panels would connect up.
Trace shape of panel


I then taped each of the sections over the appropriate part of the chest.  I used a sharp pencil to trace out the lines of the silver edging.  By pressing hard, I was able to trace the shape fairly accurately.  In some sections (like the handle and lock) I had to slit the fabric - a bit like when you're wallpapering and you need to slit an area for the light switch.


Panels cut to size
Panels cut to size
Slit cut for handle
Slit cut for handle
 You can see here what the panels looked like from the back.  I put glue over the corresponding part of the chest and slid the panels into place.


I used a piece of plastic to wedge the fabric under the silver edging.


Finished chest
The finished re-covered chest!

Friday, August 7, 2015

Nappy Mat: Things of beauty and utility 3

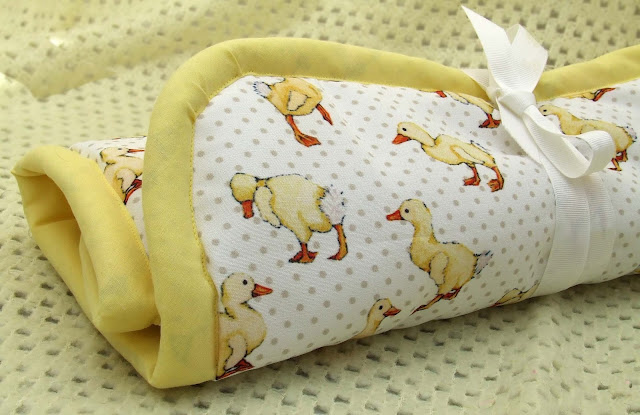
Duckling fabric nappy mat

I've recently been designing my own fabric.  I created this duckling fabric and decided to make a nappy mat - lots of people I know are having babies, so it's the perfect present!


Start by cutting out 3 pieces of fabric.  The bottom layer is a wipe clean fabric - the middle layer is wadding - and the top layer is my duckling fabric.  Make sure the fabric is washable!  I made my own pattern by measuring out a piece of paper 60cm x 45cm and then used a saucer to round off the edges.  Make each piece of fabric the same size.

Pin bias binding all round.
Pin bias binding all round


Pin the 3 pieces of fabric together by using bias binding.  You can see here I chose yellow bias binding to tie in with the ducklings.  I chose 2 inch wide bias binding.  Pin bias binding all around the nappy mat -


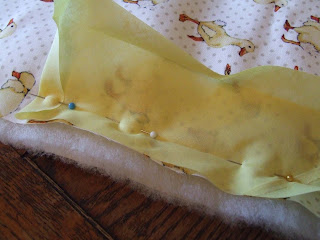
Below is a close up of how to pin the bias binding in place - unfold the bias binding and pin it along the edge of the nappy mat, matching the edges of your fabrics and the edges of the bias binding.  Insert the ribbon which will be used to keep the nappy mat rolled up between the bias binding and the top layer of fabric.  Sew along the line of the bias binding.
Insert ribbon bias and fabric
Insert ribbon bias and fabric 

Bias binding pinned in place

Fold the bias binding over and pin it in place on the other side.  You are really supposed to then stitch this by hand using a slip stitch so it is invisible, but I just very carefully top stitched it so it looked neat both from the front and the back.  I also felt it made the nappy mat a bit stronger.

Top stitch in place
Top stitch in place from other side
Ensure neat top stitching
Ensure top stitching looks neat from both sides


The finished nappy mat - they are very light and portable and make and ideal new baby present!


Finished nappy mat
Finished nappy mat