 |
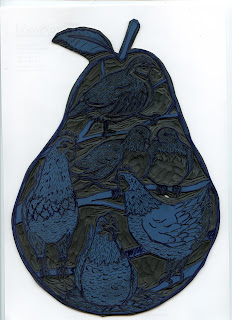
| Partridge in a Pear Tree Linocut Print |
1. Tracing your image
In the film below, you can see me tracing the image I created - this is the first stage of creating a linocut.
2. Transferring the image onto lino
Once you have traced your image, you flip over the tracing paper, and rub the image onto a piece of lino. It is very important that you go over the pencil lines with a permanent 'Sharpie' marker, otherwise you will wipe all your pencil lines off.
3. Cutting the lino
Here you can see me cutting out the partridge at the top of the design. Most of the work lies in cutting the lines to define the images - followed by clearing the areas around it. I also work on different areas to create pattern - in this case, the texture of the feathers. I use very sharp Swiss cutting tools for this part of the process.
4. Trimming the linocut
Many of my linocuts are a particular shape - in this case, a large pear. This is me working on the final parts of the image still to be cut out, followed by trimming the linocut with a craft knife. There is a starring role featuring my daughter who came to sit on my knee.
5. The final linocut
 |
| The finished linocut in Japanese linoleum |