Friday, September 4, 2015

Hens Linocut Fabric Design

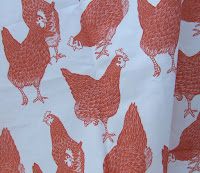
Hen Fabric
Fabrics based on my hen linocuts - buy them from Spoonflower

As you can see, I've turned one of my favourite subjects for linocuts - hens - into fabric!  Let me take this opportunity to show you the design process.


It all started during our holiday in Anglesey in September 2014.  We were so lucky to get some amazing weather, and there were some very inspirational, colourful sights, including the wonderful crops of berries, beautiful beaches and lovely landscapes.

Scenes from Anglesey
Paddling on the beautiful beaches; glorious hawthorn bushes; and cliff top view.

We were staying in a holiday cottage, and the neighbours beside us had a small holding.  They were very generous and let Estelle and I meet their chickens.  These irresistible chickens became the subjects of my next set of linocuts!
Anglesey chickens!
Anglesey chickens!
As you can see below, I made 4 different linocuts,each hen in a different pose.
Four different hen linocuts


Linocut hens on pressInked hen linocuts
I printed them up using red oil based inks, printing them onto both white rice paper or banana tissue paper.

I scanned in the finished linocuts and used them to produce two different designs.  You can see the two of the different designs and the two fabrics I created below.


Red Hen Linocut Print
Linocut of Hen in Red Ink
Red Hen Cotton Fabric


The red fabric stays most closely resembles the print of the original linocut with bright red hens on a plain white background. Click here to buy the linocut print.  Order the fabric from here.


Hen linocut in red ink


However, I also wanted to experiment with making the fabric design more complex.  I developed another option -  I changed the colouring to brown added more colour by tinting the beaks and legs.  I added a background using banana tissue with feather designs on it.  This background pattern helped draw the whole design together.  I'm really delighted with this fabric - if you like it too, order it here!  Prices from £5.50 for a fat quarter.  If you'd like to buy this linocut print, click here.

Brown Hen Cotton Fabric


Monday, August 17, 2015

Things of Beauty and Utility 4 - Railway Track Chest

Old Tuck Chest recovered in Railway Tracks Fabric
A mess of railway track pieces


I continue to do battle with Estelle's endless pile of toys - and this week, I declared war on the railway track pieces which were just shoved into the box they came in! 


tuck chest destined for skip
Old tuck chest destined for skip


I decided to recover an old tuck chest which had been destined for the skip using my new railway track design fabric.  I thought the silver edging would be a great contrast for my railway track design and would fit in with the theme perfectly.


Stiffen fabric and cut
  I measured out each section of the chest and cut a piece of my fabric slightly bigger than that section.  I reinforced each section with iron on fabric stiffener.  When I cut the panels, I made sure the panels would connect up.
Trace shape of panel


I then taped each of the sections over the appropriate part of the chest.  I used a sharp pencil to trace out the lines of the silver edging.  By pressing hard, I was able to trace the shape fairly accurately.  In some sections (like the handle and lock) I had to slit the fabric - a bit like when you're wallpapering and you need to slit an area for the light switch.


Panels cut to size
Panels cut to size
Slit cut for handle
Slit cut for handle
 You can see here what the panels looked like from the back.  I put glue over the corresponding part of the chest and slid the panels into place.


I used a piece of plastic to wedge the fabric under the silver edging.


Finished chest
The finished re-covered chest!

Friday, August 7, 2015

Nappy Mat: Things of beauty and utility 3

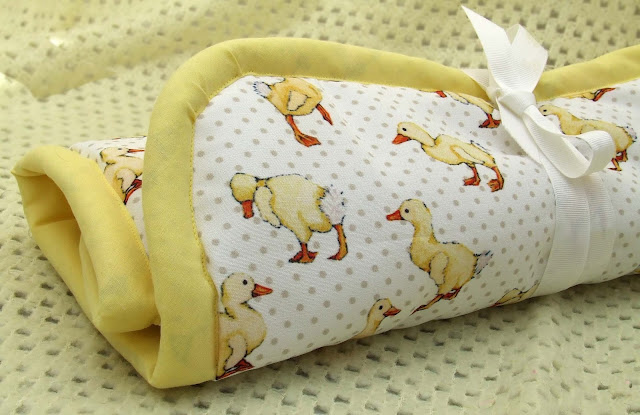
Duckling fabric nappy mat

I've recently been designing my own fabric.  I created this duckling fabric and decided to make a nappy mat - lots of people I know are having babies, so it's the perfect present!


Start by cutting out 3 pieces of fabric.  The bottom layer is a wipe clean fabric - the middle layer is wadding - and the top layer is my duckling fabric.  Make sure the fabric is washable!  I made my own pattern by measuring out a piece of paper 60cm x 45cm and then used a saucer to round off the edges.  Make each piece of fabric the same size.

Pin bias binding all round.
Pin bias binding all round


Pin the 3 pieces of fabric together by using bias binding.  You can see here I chose yellow bias binding to tie in with the ducklings.  I chose 2 inch wide bias binding.  Pin bias binding all around the nappy mat -


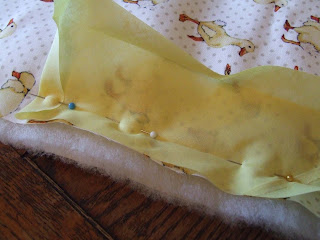
Below is a close up of how to pin the bias binding in place - unfold the bias binding and pin it along the edge of the nappy mat, matching the edges of your fabrics and the edges of the bias binding.  Insert the ribbon which will be used to keep the nappy mat rolled up between the bias binding and the top layer of fabric.  Sew along the line of the bias binding.
Insert ribbon bias and fabric
Insert ribbon bias and fabric 

Bias binding pinned in place

Fold the bias binding over and pin it in place on the other side.  You are really supposed to then stitch this by hand using a slip stitch so it is invisible, but I just very carefully top stitched it so it looked neat both from the front and the back.  I also felt it made the nappy mat a bit stronger.

Top stitch in place
Top stitch in place from other side
Ensure neat top stitching
Ensure top stitching looks neat from both sides


The finished nappy mat - they are very light and portable and make and ideal new baby present!


Finished nappy mat
Finished nappy mat


Sunday, May 3, 2015

Things of Beauty and Utility! Part 2 - Birds on a Bookcase

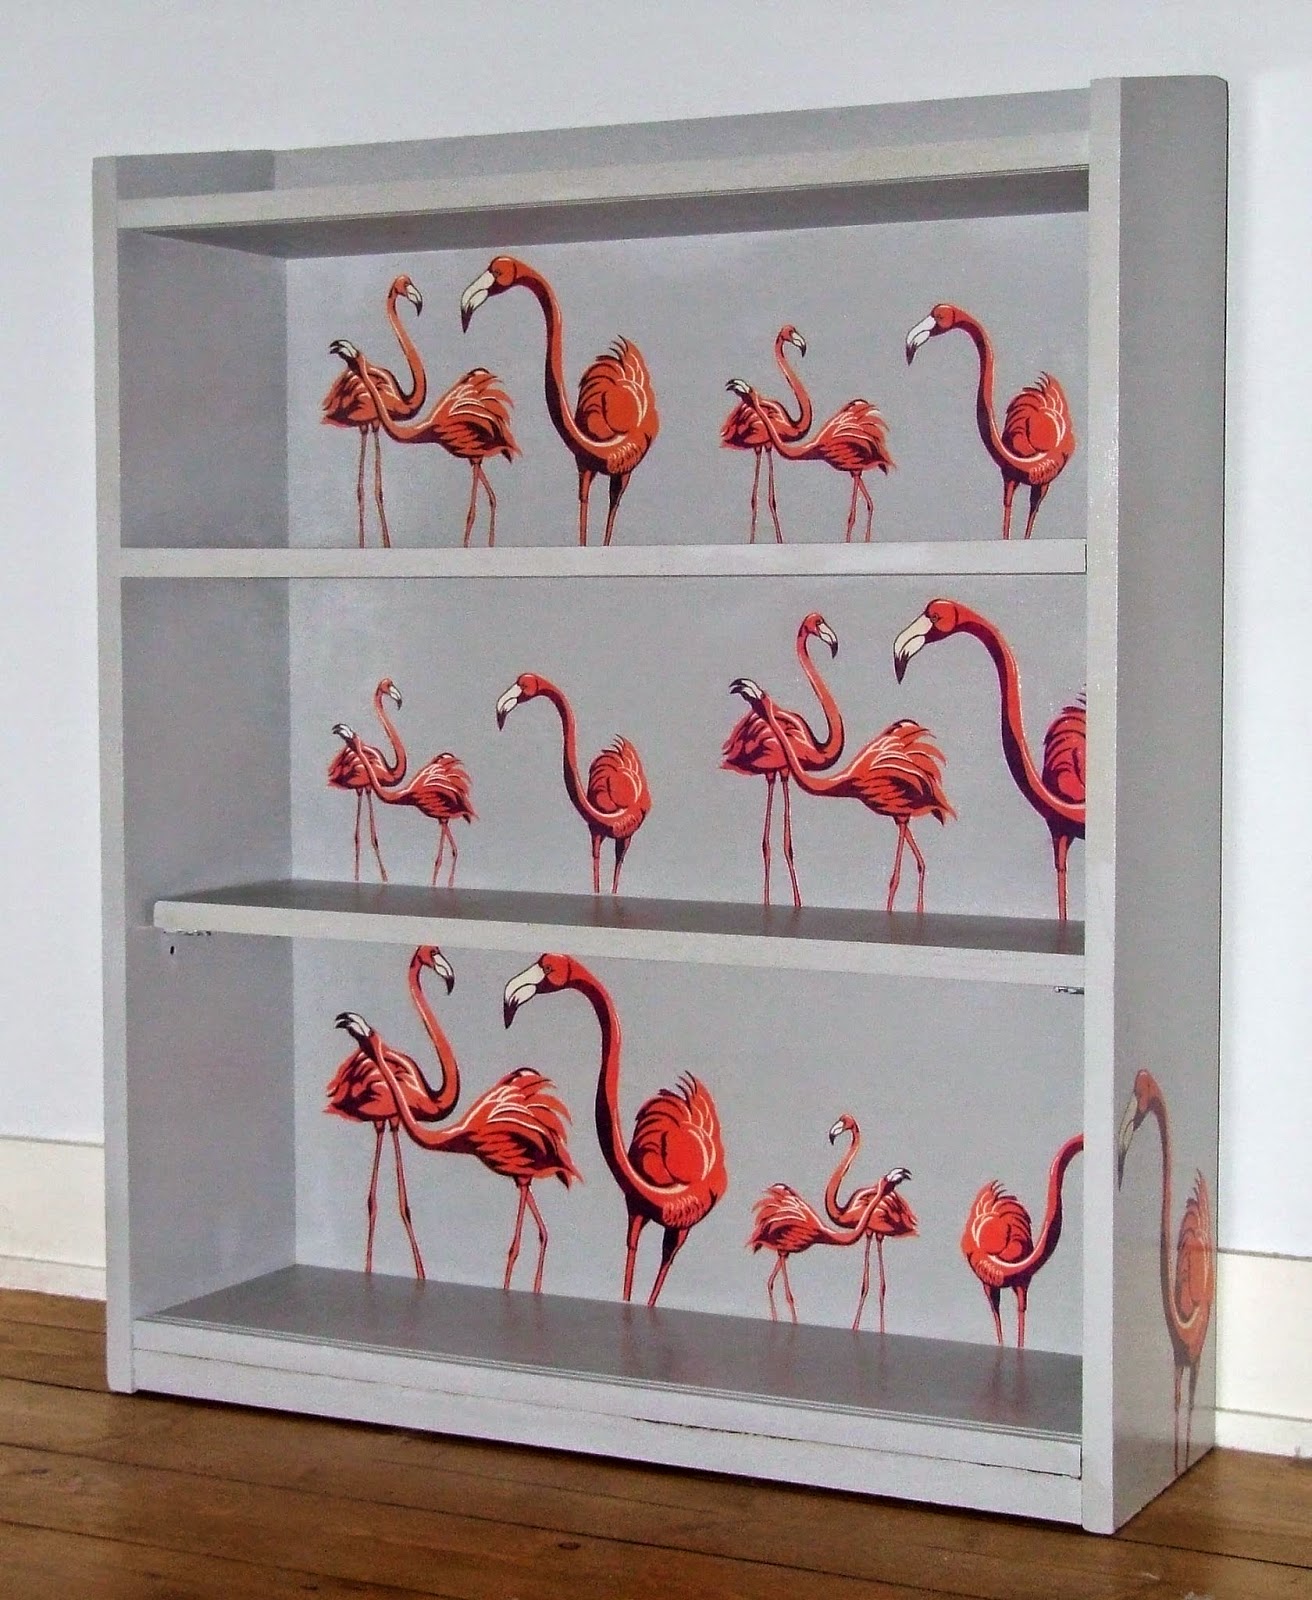
Flamingo Bookcase
Flamingo Bookcase
 Estelle has been lucky enough to receive lots and lots of books as presents - and they needed a home.  So I decided to hunt down an old bookcase in a charity shop and upscale it.


Estelle is crazy about pink, so I thought a bookcase decorated with my bright pink flamingo linocuts would be a good idea.


Bookcase from charity shop


This is the bookcase I bought for a grand total of £12 from the Castle Furniture Project here in Perth.  As you can see, it had some glass doors, but I decided discard these.  The same furniture project sells recycled paint.  I chose a pale grey-blue colour as I thought this would be a good contrast to the pink flamingoes.  I lightly sanded the bookcase and gave it 3 coats of paint.

Flamingo Linocut
Flamingo Linocut

I scanned in my flamingo linocuts (which you can buy on Etsy or at my online gallery).  I wanted to give the appearance of a flock of flamingoes, so I cut out flamingoes in a variety of sizes for each shelf.

I cut them out and glued them into place carefully using Mod Podge.


The finished flamingo bookcase

As you can see, I also glued a large flamingo onto the outside of each side of the book case.  To protect them, I gave all the flamingoes two coats of Mod Podge.  I then gave the whole bookcase two coats of varnish.


The finished bookcase - a colourful and practical addition to Estelle's bedroom.

Saturday, March 7, 2015

Two Colour Eider Duck Linocut

Eider duck linocut
Eider duck linocut
I've just finished printing an edition of eider ducks linocut prints.  They were inspired by the eider ducks we saw while on holiday in Gardenstown.
Gardenstown is a beautiful village up in the North East of Scotland.  It's a fishing village built right on the sea.  It's a perfect place to visit as a family as it's almost car free and the beach is practically at your front door!  Lots of seabirds live there, including a population of eider ducks.

Gardenstown is built right on the sea!
Gardenstown is built right on the sea
Gardenstown harbour
Gardenstown harbour


gannet colony
There is a large gannet colony nearby
MacDuff Aquarium
At the MacDuff Aquarium


I decided to produce a simple two colour linocut.  I love the technical challenge of reducing what you would like to portray down to 4 colours: the colour of the paper; the 2 colours of each separate linocut panel; and the 4th colour where the panels overlap.

First panel inked up in black


 1.  Here you can see my first linocut panel, which is printed up in black.


Second panel inked up in blue


2.  I made a second panel, which I printed up in a grey-green blue.  You can see clearly in this photograph the overlap of colours, where there are ripples on the water.


3.  The edition of eider ducks prints drying off on the rack.  They are printed on to very beautiful but very fragile rice paper, so you need to stretch them out carefully.

Eider duck prints drying off


Monday, March 2, 2015

Beautiful Things of Utility! Part 1 - Printed, drawstring bags

Over the last few weeks, I've been using the excuse of tidying up Estelle's room to make different things which are both beautiful and useful!  Below you can see the drawstring bags I've been making by printing on fabric.


Drawstring bags
Drawstring bags using some of my illustrations
Duckling drawstring bag
Details of the duckling design
Duckling drawstring bag reverse
Reverse side of the duckling bag

Panda bag
Close up of panda bag.

Dachshund drawstring bag
I would like to show you how to make the dachshund drawstring bag shown here on your left.  

I am going to show you how I print onto fabric using a computer printer - but please note, if you would like to do this, you are doing this at your own risk!

All of the illustrations you see here are available to buy through the Three Bears Prints Etsy shop.  Here's the link to my shop:
Three Bears Prints Etsy Shop
You can find the panda, ducklings and dachshunds in this section of my shop.


Apply spray mount onto card
1.  Spray mount onto card.

1.  First of all, you will need to work out your design and the measurements for your bag. I use Photoshop.

I used Photoshop to come up with an oblong dachshund design measuring 16cm x 48cm.  The measurements of my canvas was 26 x 64cm so that I had lots of space for seam allowances.

I cut a piece of card measuring 26 x 64cm.  (I am lucky enough to have a printer which can up to 32 x 67cm.)

I put newsprint down to protect my table, and applied spray mount to the whole of the piece of card.


Smooth fabric over sticky card.
2.  Smooth fabric over sticky card.
2.  Cut your fabric (and use fabric which is fairly thin) a little bigger than your card.  Iron it then carefully smooth it over the card.


 Perfectly smooth surface.
4.  Perfectly smooth surface.
Trim fabric
3.  Trim fabric.
3.  Use a metal rule and very sharp craft knife to trim the fabric.


4.  This produces a flat, perfectly trimmed surface on which to print.


Printing the fabric
5.  Printing the fabric
5.  You can now print your design.  Make sure you set up the print options correctly - so for me, I have to choose custom print and put in the size of the card, and set it to 'high quality' printing.  

Depending on what I'm printing, I will also increase the contrast, and decrease the brightness of a design, to compensate for the light fabric.

Carefully feed the fabric cover card in, and watch it as it feeds through the printer, to make sure it doesn't jam.


Close up of printed fabric
6.  Close up of printed dachsies


6.  You can see that you can print really high quality, detailed images!
At this point, I would waterproof my fabric by spraying the same protector on them such as you would use to protect canvas bags and shoes.


I'm a fairly novice sewer, but drawstring bags are easy.  I looked at this blog post for some instructions:
http://notesfromthekitchentable.com/2013/01/30/how-to-make-a-drawstring-bag/ 

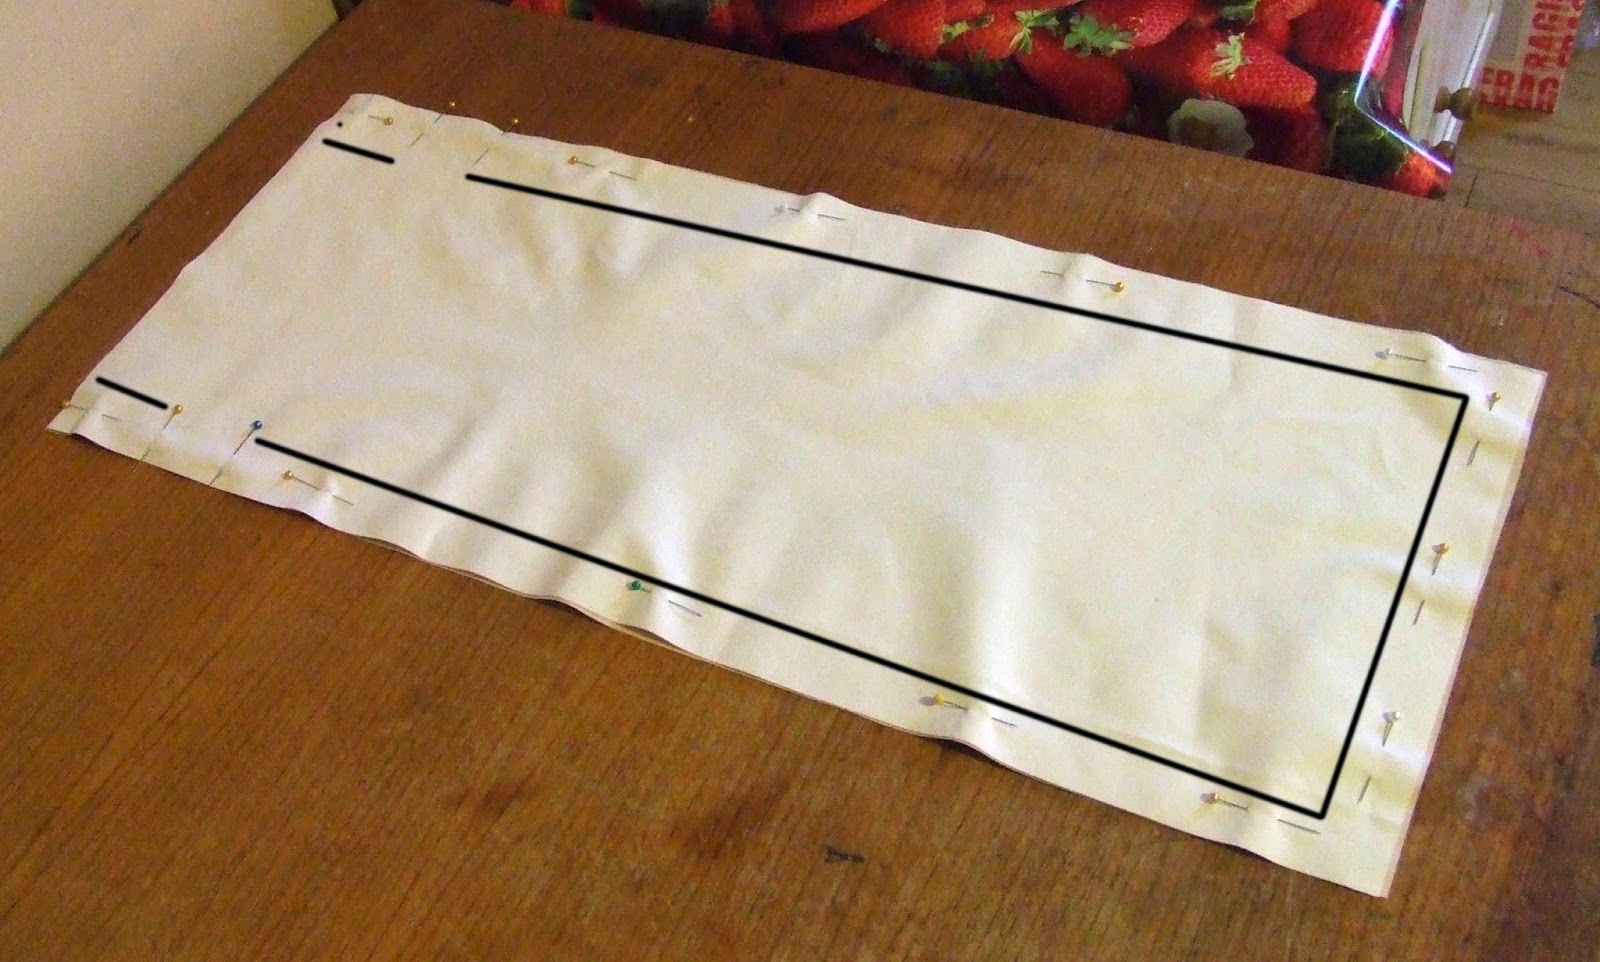
To summarise, you sew the edges, leaving a gap where the string (or in my case, ribbon) will go...
Sew round hole for string

Sew the edges of the bag leaving gap for string


...then you open up the edges and sew around the hole for the string...


Create channel for string
Thread through string
Thread through string - or ribbon
....turn over the top of bag to create channel for the ribbon... turn it the right way, and using a large safety pin, thread through the ribbon.


dachshund drawstring bag
The finished dachshund drawstring bag!